
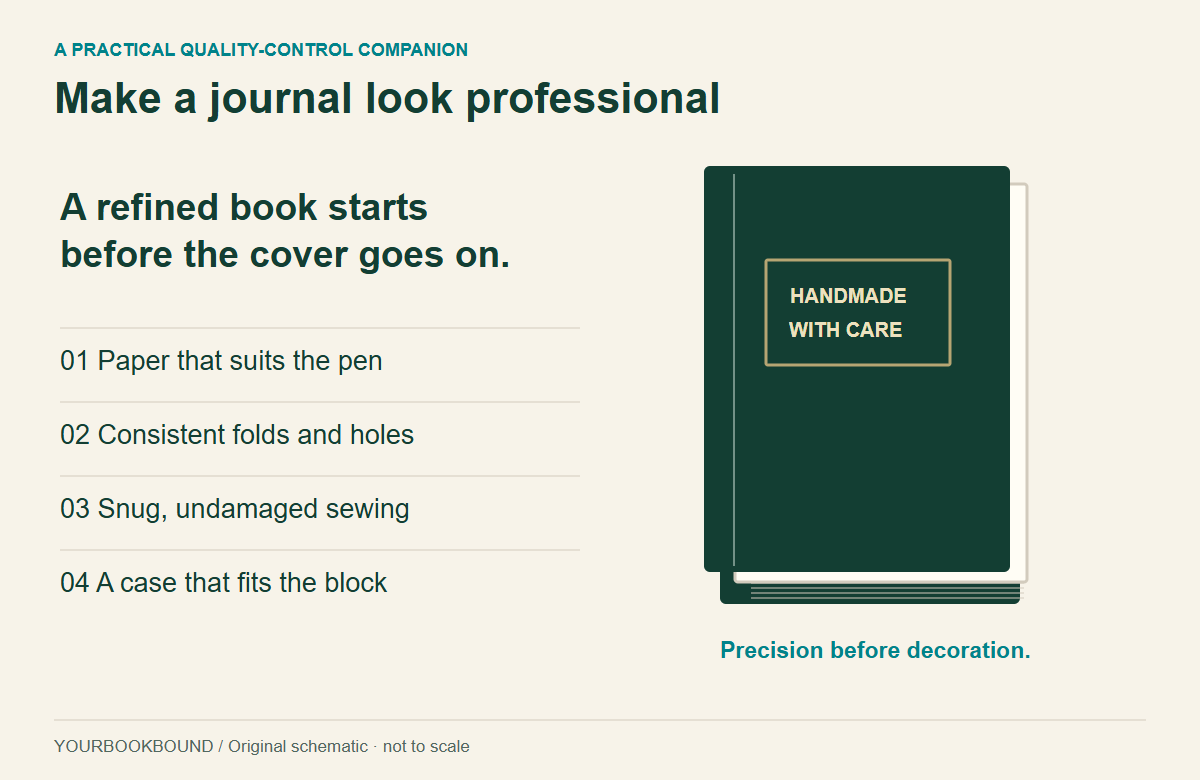
To make a handmade journal look professional, improve the parts that control how it opens and holds together: suitable paper, grain parallel to the spine, consistent signatures, accurately placed sewing holes, balanced thread tension and a well-fitted cover. Test these before adding decorative details. Expensive leather cannot compensate for a twisted text block or a cover that pulls when opened.
This is a quality-control companion for people who have tried making a journal and want a neater result—not a complete stitch-by-stitch binding pattern. It draws on Renaissance Bookbinding’s video on making handmade journals look professional, with independent material guidance and practical checks added below. The diagrams are original schematics, not photographs of the creator’s books or YourBookBound customer orders.
On a small screen, tap any diagram below to open it at full size.
1. What makes a handmade journal look professional?
A convincing journal looks intentional and works comfortably. Its pages turn without catching, the cover sits where it should, and the structure does not shift loosely in your hands. The finish can be plain bookcloth, exposed stitching or carefully worked leather. None of those styles is automatically better than the others.
Before starting another book, write down the result you want. A pocket travel journal needs different paper and bulk from a watercolor sketchbook. An exposed-spine binding should not be judged against the silhouette of a closed-back case binding. A deliberately untrimmed edge is not the same problem as a crooked text block.
Use three questions to assess your current journal:
- Does it function? Can you write near the center without forcing the opening?
- Is it consistent? Do repeated details—folds, hole positions and margins—look related?
- Is the finish deliberate? Are rough edges a chosen style, or evidence that parts moved during assembly?
Choose one recurring problem to improve on a small practice book. Changing the paper, thread, number of sheets and binding method at once makes it difficult to learn which change helped.
2. What paper should you use for a handmade journal?
Choose paper for the actual writing or drawing medium, then check its grain and folding behavior. GSM means grams per square meter: it measures mass per area, not a complete quality score. Thickness, surface, opacity and ink behavior still matter.
In the video, the maker prefers his 120 gsm stock to the lighter paper he demonstrates. That comparison is useful, but it does not establish that every 120 gsm paper is better than every 80–90 gsm paper. Clairefontaine’s own notebook-paper specification, for example, describes a 90 g/m² stock designed for writing, opacity and easy folding.
Run a pen test before buying a whole stack
- Write on a sample using the pen and ink you expect to use.
- Let it dry, then check for smearing under normal handling.
- Look at the reverse. A visible shadow is show-through; ink penetrating the sheet is bleed-through.
- Inspect the next sheet underneath. Has ink transferred or penetrated onto it?
- Fold the sample and write near the fold. Decide whether its stiffness and surface suit your use.
For wet media, test paper designed for that medium. Do not assume a thicker writing paper becomes watercolor paper merely because the GSM number is higher. Record the exact stock and the test result; “cream paper, 120 gsm” is not enough information to reproduce it later.
Keep grain parallel to the spine
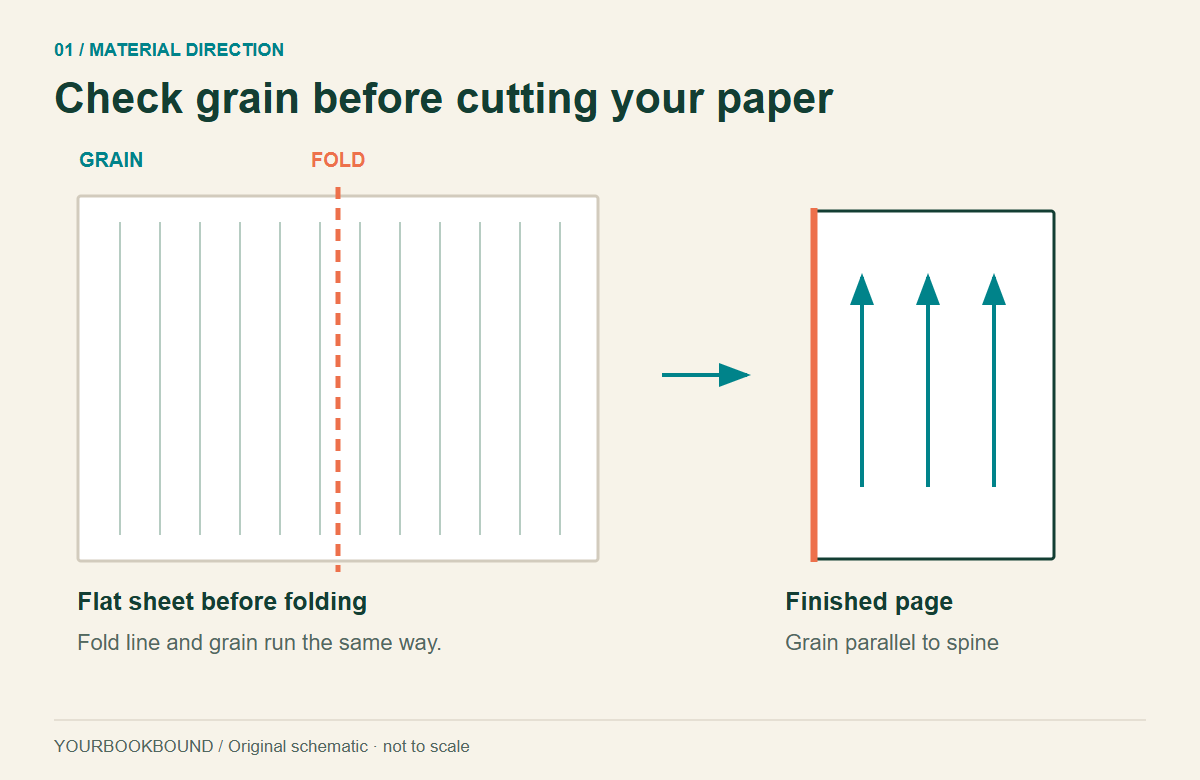
For ordinary machine-made book paper, plan the grain before cutting. Schmedt’s bookbinding catalogue, page 31, explains that industrially produced paper bends more easily with the grain and expands differently across it. Its guidance is to orient the grain parallel to the book’s spine.
Gently curve a sample in both directions without creasing it. One direction will usually offer less resistance. Confirm with the supplier if the difference is unclear, and mark the grain on a scrap. Do not assume every A4 or US Letter sheet has the grain you need after folding.
3. How many sheets belong in a signature—and how should you fold them?
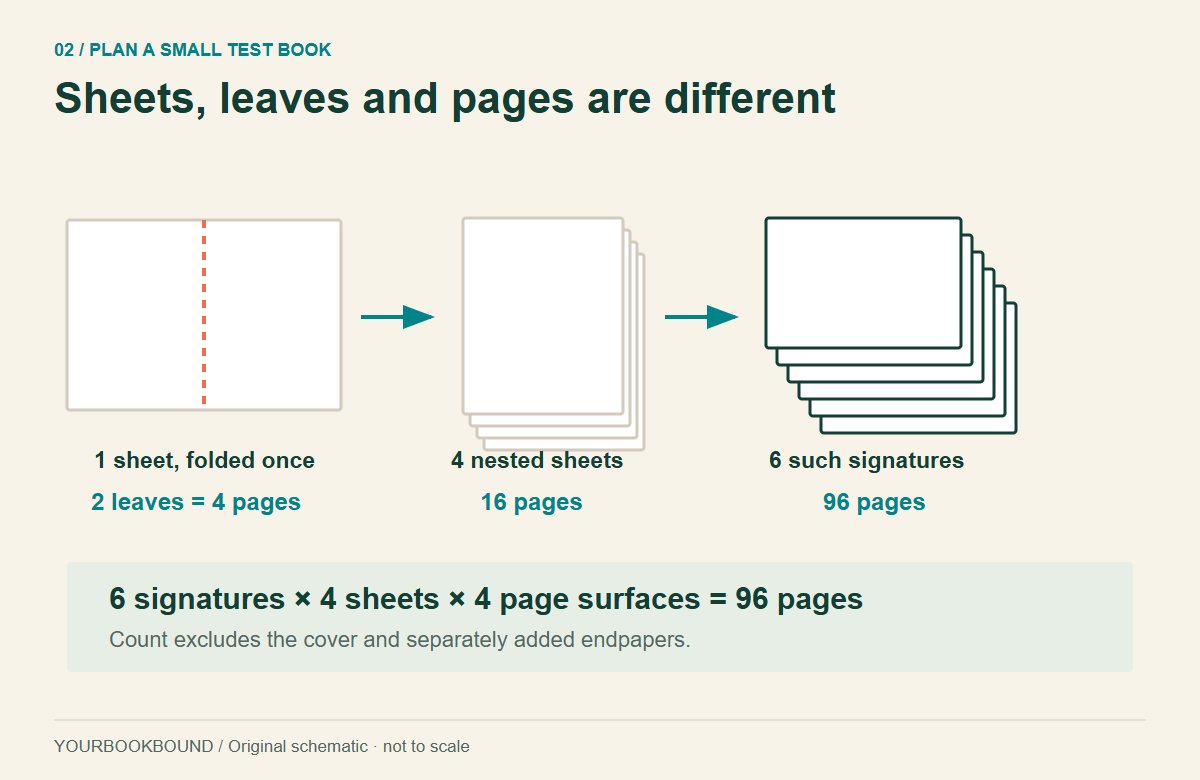
A signature is a group of folded sheets nested together and worked as a section. The right number of sheets depends on paper thickness and the binding you are making. Start with the section size in a reliable tutorial for that structure, then test your actual stock. A very thick section is not a shortcut to a refined book.
Count page surfaces, not just sheets
One sheet folded once produces two leaves. Each leaf has a front and a back, so that is four pages. As a planning example, four folded sheets give 16 pages; six of those signatures give 96 pages. This calculation excludes the cover and any separately added endpapers. It is not a recommendation that every journal should use four-sheet signatures.
Should you fold sheets individually or together?
There is a real difference in the advice available. At around 7:00, Renaissance Bookbinding demonstrates folding sheets individually against a taped ruler before nesting them. By contrast, educator Ali Manning’s signature-preparation guide at Vintage Page Designs recommends folding the gathered sheets as one unit. Do not turn either demonstration into a rule for every paper and binding.
Our recommendation is a small comparison before committing the whole book:
- Prepare two equal sets from the same paper, with the same grain direction and sheet count.
- Fold one set as a group and the other individually, then nest it.
- Keep the same head edge as your reference. Use a clean folding tool without crushing or polishing the paper excessively.
- Let both sections settle under the same suitable, even pressure, with clean protection.
- Compare seating at the folds, wrinkles, head alignment and opening behavior. If needed, sew a small sample before choosing.
This is an editorial test protocol, not a claim that we have experimentally proved one method superior. The result to judge is the assembled section, not just how sharp a single crease looks. Some projection of inner sheets at the fore edge is a consequence of nesting; do not pull sheets away from their folds just to make that edge flush.
4. How do you keep sewing holes aligned?
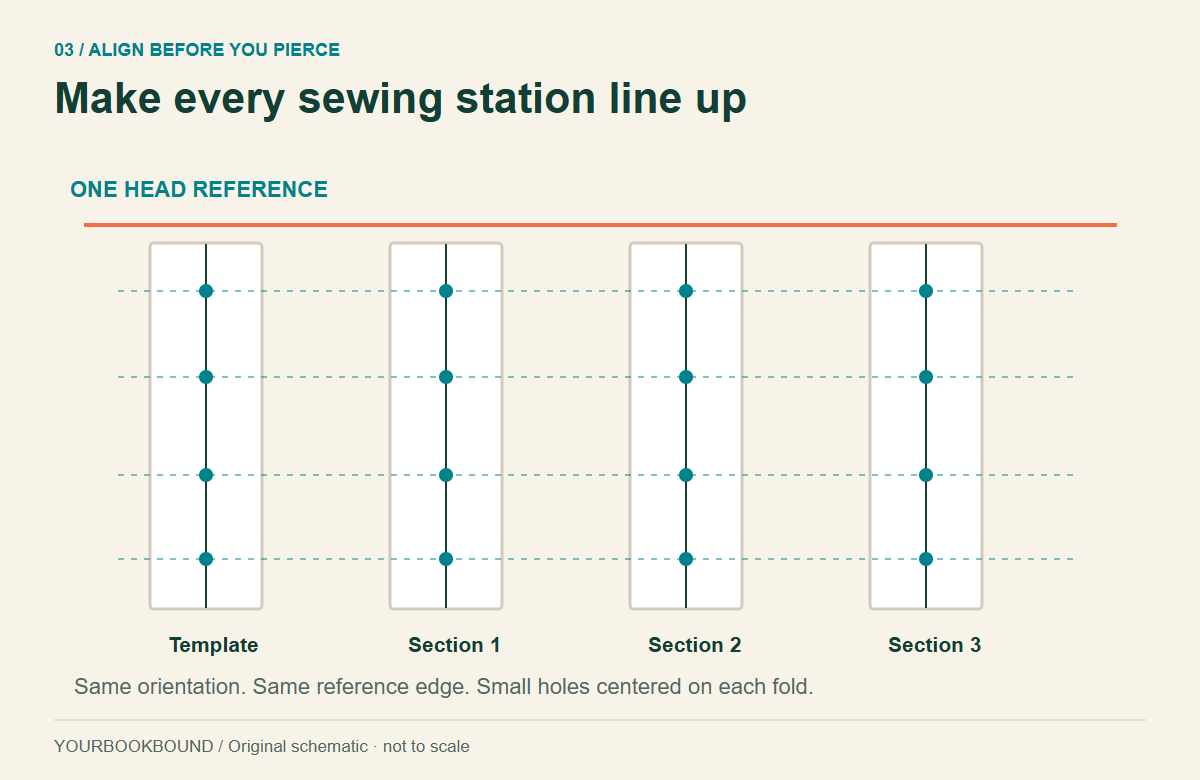
Use one clearly marked template and one reference edge throughout the book. The top of the book is the head; the bottom is the tail. Mark the template so you cannot accidentally reverse it halfway through the stack.
- Settle each section so its head is aligned.
- Seat the template against that same head reference.
- Support the fold in a suitable punching cradle or the support specified by your tutorial.
- Pierce at the marked stations, controlling depth. Keep fingers out of the awl’s exit path.
- Stack the pierced sections and inspect the rows before sewing.
The illustration shows alignment only. It is not a universal four-hole sewing pattern: station count and spacing must match your chosen stitch, book size and supports. If one section is upside down or displaced, correct it now rather than trying to make the thread pull it into position.
Use holes large enough for the needle and thread to pass without forcing, but avoid unnecessary enlargement. Jamie Butler’s illustrated binding tutorial likewise emphasizes narrow holes and an appropriately sized needle. Repeatedly wiggling an awl through a misplaced hole does not restore the paper that has already been removed or torn.
5. What does good sewing tension feel like?
Snug is not the same as maximally tight. You want the sections held securely without loose loops, distorted folds or cuts radiating from the sewing holes. Check as you go: hidden slack becomes harder to correct once several more sections sit above it.
In the source video, the maker takes up tension in the direction of sewing rather than yanking outward against the paper. Use the instructions for your actual stitch, and stop if a hole begins to elongate. More force is not a repair.
At the end of each section, inspect three things: the thread path is complete, every intended link or support has been included, and the section still sits square to the others. A missed stitch is a reason to go back, not a reason to conceal the spine sooner.
Needle and thread belong together as a system. A large needle makes access easier, but may create unnecessarily large holes. Thick decorative thread may suit an exposed binding but add unwanted bulk to a slim journal. Compare the sewn sample with your target before committing to an entire text block; do not try to eliminate all spine thickness by overtightening.
6. How do you make the cover look crisp and stay aligned?
Measure the prepared text block, not only the page size you originally planned. Folding, sewing and any lining affect the object the cover must fit. Follow one complete construction method: cover dimensions, joints, attachment and spine treatment are related, not interchangeable details from unrelated tutorials.
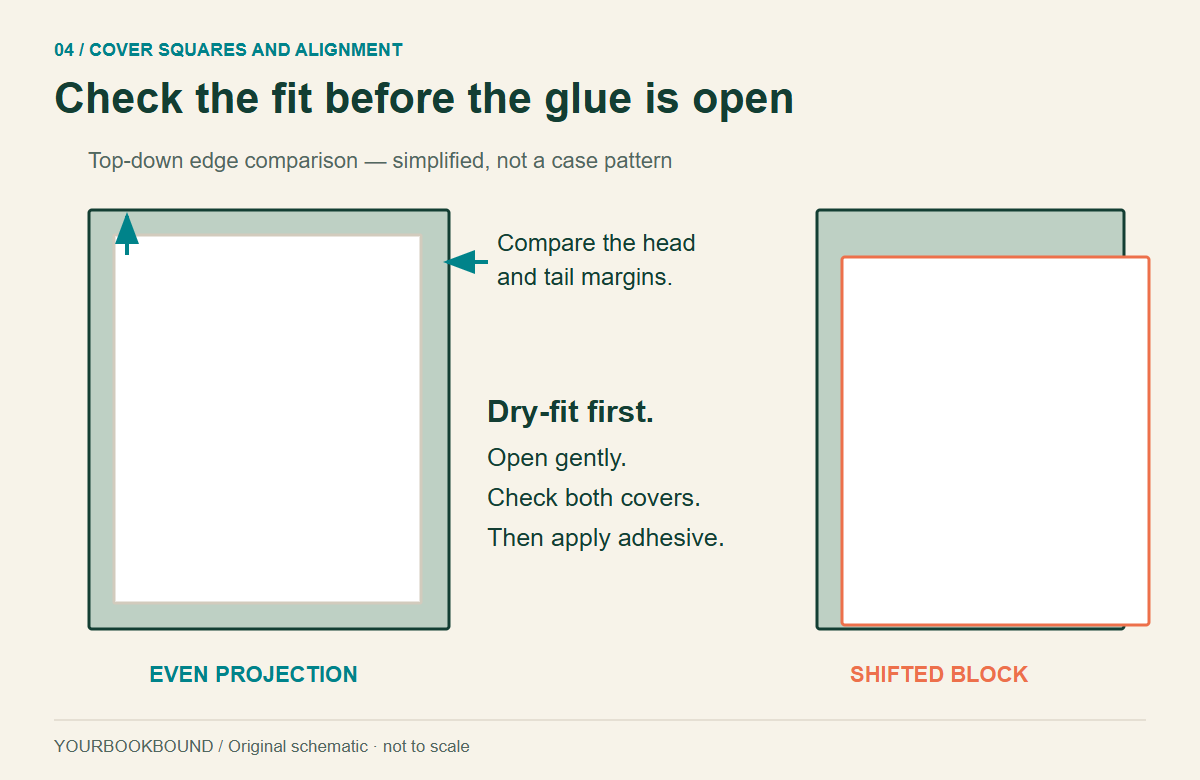
Rehearse the fit before applying adhesive
Place the block and cover components together without glue. Compare the visible projection at the head, tail and fore edge; these projecting board edges are often called squares. Check both covers. Then open gently to see whether the joint arrangement allows movement without dragging on the endpapers.
The video includes a folded-paper insert around the sewing-tape ends in its particular structure. The transferable lesson is to stabilize and check the attachment before covering. Do not add that insert indiscriminately to a different case binding; endpaper and support arrangements must work with the selected construction.
Keep the glue stage controlled
Have your pieces, protective sheets and pressing arrangement ready before opening the adhesive. TALAS’s PVA guidance identifies excessive glue, uneven coverage and adhesive drying before assembly as common causes of poor results. Apply an appropriate thin, continuous layer rather than puddles, and follow the product’s working and drying instructions. Protect clean pages from adhesive and moisture.
Test covering material on scrap board first. If using fabric, verify that the backing and adhesive combination prevent visible strike-through. Practice a corner with the actual board thickness; a cut that works on one material can expose a board corner on another. Keep your hands, ruler and work surface clean as you move from gluing to handling the outside cover.
Add decoration after the structure passes
A ribbon, label or decorative endband can finish the design. It cannot correct a loose sewing structure or a twisted case. The source video’s glued-on endband is a finishing detail, not evidence that the book has a hand-sewn structural headband. Describe your own work accurately if you give or sell it.
7. What should you check when a journal looks uneven?
Use the visible symptom to locate the next check. These are starting points, not diagnoses from a photograph.
- The head of the book forms a staircase.
- Compare section orientation and registration before blaming the cover. Check whether the same edge was used for every template placement.
- The fore edge projects in small repeated steps.
- Distinguish normal nesting projection from displaced sheets. Decide whether your design calls for a trimmed or intentionally untrimmed edge.
- The spine feels loose when pages turn.
- Inspect missed links and trapped slack. Do not flood an unfamiliar sewn structure with glue to hide the symptom.
- Holes tear or folds pucker.
- Stop and compare needle size, hole placement, thread and tension on spare sections. A damaged fold may need replacement before assembly continues.
- The case looks square closed but pulls when opened.
- Recheck the joint and attachment against the chosen binding instructions. A neat closed outline is not enough.
- Cover corners lift or the surface looks patchy.
- Test material compatibility, adhesive coverage and assembly timing on scrap. More glue everywhere is not a reliable fix.
If you choose to trim, work only within your tool’s safe capacity. Use a suitable cutting mat, keep fingers clear of the blade path and make controlled shallow cuts rather than forcing through a thick block. For children making a journal, an adult should handle knives, awls and other sharp tools.
8. A final quality checklist before you call it finished
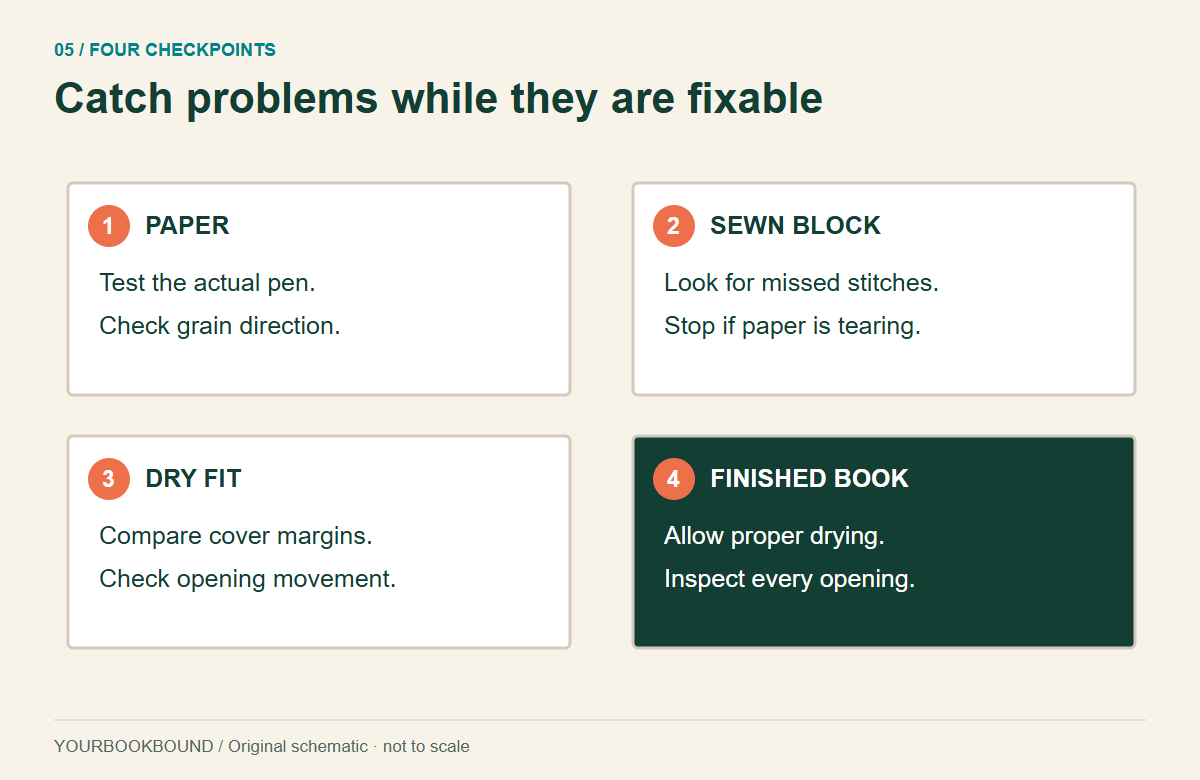
- The intended pen works on the selected paper.
- Sections have a consistent orientation and the intended page count.
- Sewing follows the chosen pattern, without missed links, loose loops or torn folds.
- Cover alignment is consistent with the binding’s design.
- Adhesive has dried according to its instructions; pages are not stuck together.
- The book opens and pages turn comfortably without being forced flat.
- There is no exposed sharp thread end, protruding hardware or sticky residue.
- Any rough or untrimmed edge is an intentional choice.
Check near the front, in the middle and near the back—not just at the easiest opening. For a gift journal, write a short material note on a separate card so the recipient knows which pens or media you tested. Keep another note for yourself identifying the single change to make on the next build.
9. Should you bind it yourself or have a hardcover printed?
Choose DIY when making the object is part of the pleasure, or when you want a blank journal with a specific hand-bound structure. If you are starting from scratch, our home printing and binding guide covers a broader beginner workflow.
A different need is turning finished writing, illustrations or designed pages into a printed book. In that case, paper-file preparation and production proofing matter more than learning a new stitch. Our PDF-to-hardcover guide explains that route, while the printing and binding process guide shows what happens during production.
If that second route describes your project, send your completed file for a free initial check. You can review the findings before deciding whether to continue. This is a file-review invitation for printed books—not an offer of free printing, and not a claim that our standard service reproduces the leather journal shown in the video.
Quick answers
Do I need expensive equipment to make a neat journal?
Not for every structure. Start with an appropriate beginner method and accurate basic tools. Some processes do need specialized equipment; choose a simpler binding rather than improvise a hazardous substitute. A reference stop and consistent template can solve an alignment problem that a decorative upgrade cannot.
Is 120 gsm always the best journal paper?
No. It is the source creator’s preference for the demonstrated project. Test the specific paper with the actual pens or drawing media, then assess opacity, folding and bulk.
Does every handmade journal need perfectly trimmed edges?
No. Intentional untrimmed edges can suit a handmade book. The important distinction is between a consistent design choice and sections that are displaced or poorly attached.
Can I use this guide as a complete sewing pattern?
No. It helps you inspect and improve a project. Use a complete tutorial for the particular binding you choose; the hole diagram and cover illustration do not specify a construction pattern.
Sources and editorial note: The linked Renaissance Bookbinding video is the inspiration, with its author credited. Material and technique checks link to the relevant maker, educator or manufacturer above. Illustrations and testing checklists are original YourBookBound educational work. We have not represented the creator’s demonstrations as our own tests or customer cases.