
A PDF can open perfectly and still be wrong for book printing. Ten quiet minutes spent checking page size, page order, bleed, gutter space, images, fonts, and cover setup can prevent the most obvious surprises. It cannot replace a printer-specific preflight, but it will tell you whether the file is ready for review or clearly needs work.
What does “print-ready PDF” actually mean?
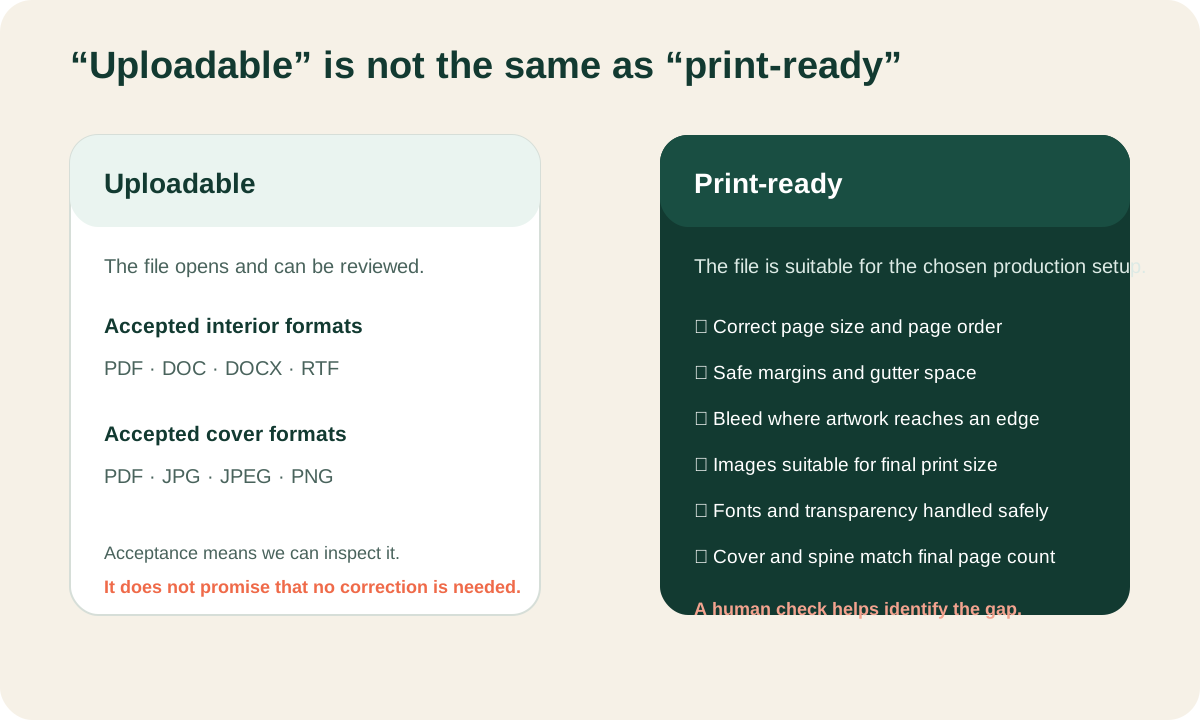
A print-ready PDF is ready for a specific production setup. That last part matters. A file prepared for a 6 × 9 paperback is not automatically ready for a square hardcover. A cover built around one page count may no longer fit after the interior changes. Even two printers offering the same finished size can use different templates or tolerances.
This is why a generic “high-quality PDF” preset is only a starting point. The file still has to match the chosen trim size, binding, paper, color process, and cover template. If a printer gives you a template or written file specification, use that document rather than a number copied from another website.
Short version: “It opens” means the PDF is uploadable. “It matches the job” means it may be print-ready. “I approved the proof” means you accepted the prepared pages that will be used for production. Those are three different checkpoints.
The 10-minute print-ready PDF check
Open the PDF in a desktop viewer and show the page thumbnails. Do not start by zooming into the cover. Start with the boring details. They are where expensive mistakes tend to hide.
1. Confirm that every interior page uses the intended finished size
Look at the PDF’s page dimensions, not the size of the window on your screen. Letter, A4, presentation slides, and custom artboards can all look normal in a viewer. If the page size changes later, text can move, images can enlarge, and the page count can change.
Also check for mixed page sizes. One odd page may be a deliberate foldout in another product, but in an ordinary bound book it is usually a warning that content was exported from different source files.
2. Read the thumbnails from first page to last
Verify the total page count and the order of the title page, copyright or dedication pages, chapters, activity pages, acknowledgments, and final page. Look twice at blank pages. A blank may be necessary for pacing or right-hand starts, or it may be an accidental export.
Facing pages deserve their own check. If a spread only works when two pages sit together, confirm that the left and right pages land in the correct sequence.
3. Decide which pages need bleed
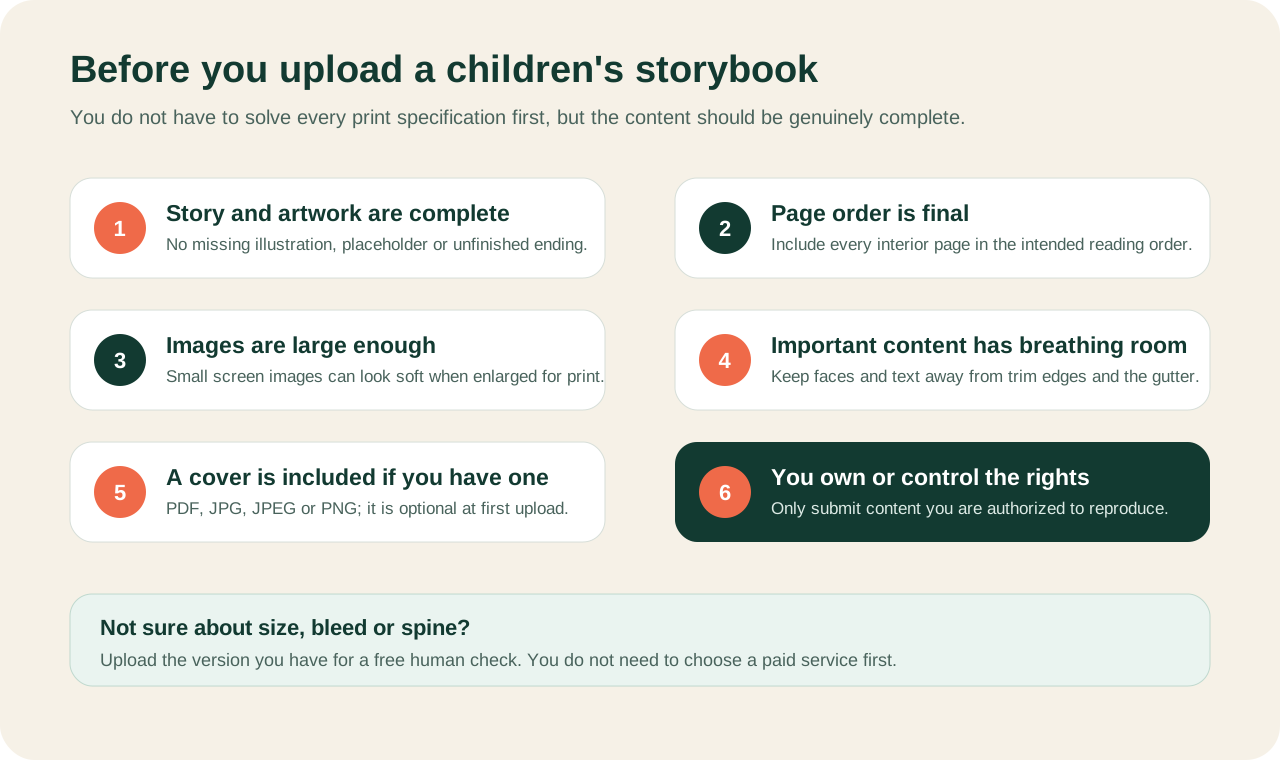
Bleed is extra image or background area beyond the final trim line. It gives the trimming process room to vary without leaving a thin white edge. A page with a deliberate white border may not need bleed. A full-page illustration usually does.
The required amount is printer-specific. KDP, for example, publishes its own bleed dimensions and requires a bleed-aware page size for interiors with edge-to-edge artwork. That does not make the same measurement universal. It shows why you should prepare the file against the actual production specification.
4. Protect text and writing space near the gutter
The inside edge of a page sits beside the binding. Text that looks comfortably placed on a loose sheet can feel cramped when the page is bound. This is especially easy to miss in workbooks: a response box may technically remain visible but still be awkward to write in.
Check page numbers, captions, faces, speech bubbles, and small illustration details near both the trim edges and the gutter. The safe area and inside margin depend on the page count and binding, so do not treat the minimum margin from a different platform as a house rule for every book.
5. Inspect images at their printed size
Zooming far beyond 100% can reveal compression blocks, jagged edges, and soft scans, but it can also make a perfectly usable image look worse than it will in print. The useful question is whether the image has enough detail at the size it will occupy on the page.
Watch for tiny web images stretched across a full page, screenshots, heavily compressed messaging-app files, and artwork that has been repeatedly saved as JPEG. Keep the original image files available. A clean replacement is usually better than sharpening a damaged export.
6. Check fonts, transparency, and fine lines
Fonts should be embedded so another system does not substitute them. Scan the PDF for changed line breaks, missing symbols, and unusual characters. Thin rules, transparent shadows, overprints, and layered effects also deserve attention because they may render differently in a print workflow.
Adobe Acrobat Pro’s Preflight tool can inspect issues involving fonts, transparency, image resolution, color, ink coverage, PDF compatibility, and document structure. A clean-looking screen preview is useful, but preflight checks information that is not obvious to the eye.
7. Treat the cover as a separate production file
A front-cover image is not a complete hardcover wrap. The production cover normally includes the back, spine, front, and extra areas required by the binding method. Hardcover templates may also include hinge, wrap, and safe zones.
Finalize the interior first. The final page count, paper, book size, and binding affect the spine and overall cover dimensions. KDP’s hardcover guide, for example, uses a calculated layout containing the back, spine, front, wrap, hinge, and safe areas. YourBookBound uses the template for the selected production route rather than applying another platform’s cover dimensions.
8. Review the exported PDF itself
The Word, Canva, Affinity Publisher, or InDesign file can look correct while the exported PDF contains a shifted element or a missing font. Close the source application. Reopen the actual PDF you plan to send and read it once from beginning to end.
What a screen check cannot prove
A digital check can confirm order, placement, visible cropping, and many technical properties. It cannot show the exact feel of the paper, how a bound spread opens, or whether printed color will look identical to a backlit display. Monitors differ. Printed ink and paper interact.
A digital proof has the same limit. It is the right place to catch a wrong name, a blank page, a shifted caption, or a reversed cover. It is not a physical sample. If color, paper, or opening behavior is critical to a larger order, make one physical copy the checkpoint before you commit to inventory.
What should you do if the PDF fails one of these checks?
Do not flatten every page into an image or resize the PDF at random. Those shortcuts can hide the original problem and create a new one. Return to the source file when possible. Correct the page setup, replace weak images, adjust margins, and export a fresh PDF.
If you no longer have the source file, the next step depends on the damage. A technical correction may be enough for a nearly finished PDF. A file with inconsistent pages, missing bleed, and a front-cover image instead of a complete wrap may need layout and cover preparation.
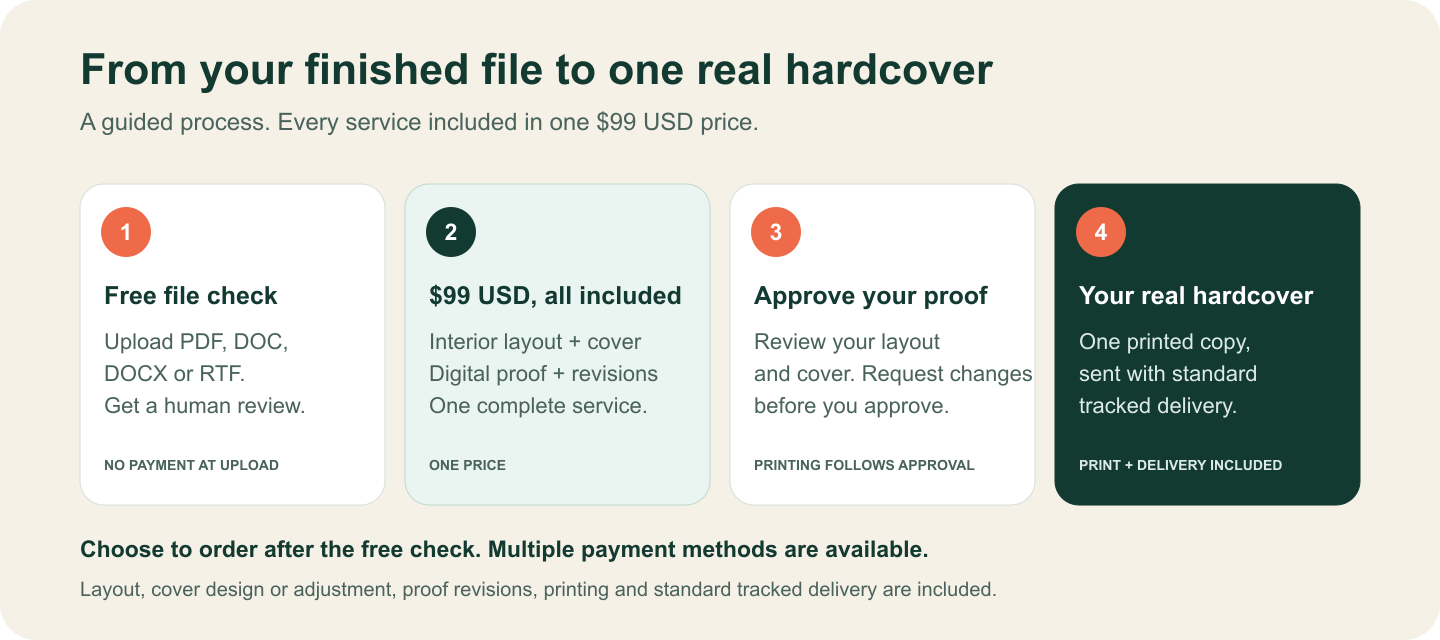
YourBookBound accepts a finished interior as PDF, DOC, DOCX or RTF for a free human file check. A separate cover is optional at the first upload. Send the file you have and tell us what is uncertain. The $99 USD service includes technical file corrections, interior layout and cover/spine preparation, a digital proof, one hardcover and standard tracked shipping.
For the complete production route, read How to Print a Book From a PDF. For accepted upload formats and the shortest preparation notes, use the File Guide.
Common questions about print-ready PDFs
Is a PDF print-ready if it opens without errors?
No. Opening proves that the file can be viewed. It does not prove that the page size, bleed, margins, images, fonts, or cover match the selected book.
Do all book PDFs need bleed?
No. Bleed is needed when artwork or background color is meant to reach the trimmed edge. A page designed with white space around the content may not need it. Follow the specification for the selected printer and binding.
Do all images have to be 300 DPI?
There is no useful universal answer without knowing the image’s printed size and the production requirement. Check effective resolution at final size. A small image enlarged across a page can fail even when its file properties sound impressive.
Can a Word document become a print-ready PDF?
Yes. Set the intended page size and margins first, use stable fonts and images, then export and inspect the PDF. Editable documents can reflow, so the exported PDF needs its own final review.
Should the cover be in the same PDF as the interior?
Usually not for a production upload. The interior is a sequence of pages. The cover is a separate layout based on the final page count, size, paper, and binding. YourBookBound allows the first review without a finished cover file.
Does a digital proof guarantee the physical result?
It confirms the prepared content and layout visible on screen. It cannot reproduce paper feel, binding behavior, or exact printed color. Those require a physical copy.
You do not need to diagnose everything yourself
Send the file you have for a free human check.
No payment is required at upload. We check the interior and optional cover, explain what needs attention and confirm the production plan for the $99 USD service.
Sources reviewed: Adobe Acrobat Preflight; Adobe print-production tools; KDP trim, bleed, and margin guidance; KDP hardcover-cover guidance; Google’s people-first content guidance. Platform specifications can change and do not substitute for the requirements of your selected production provider. Sources last reviewed August 30, 2026.