
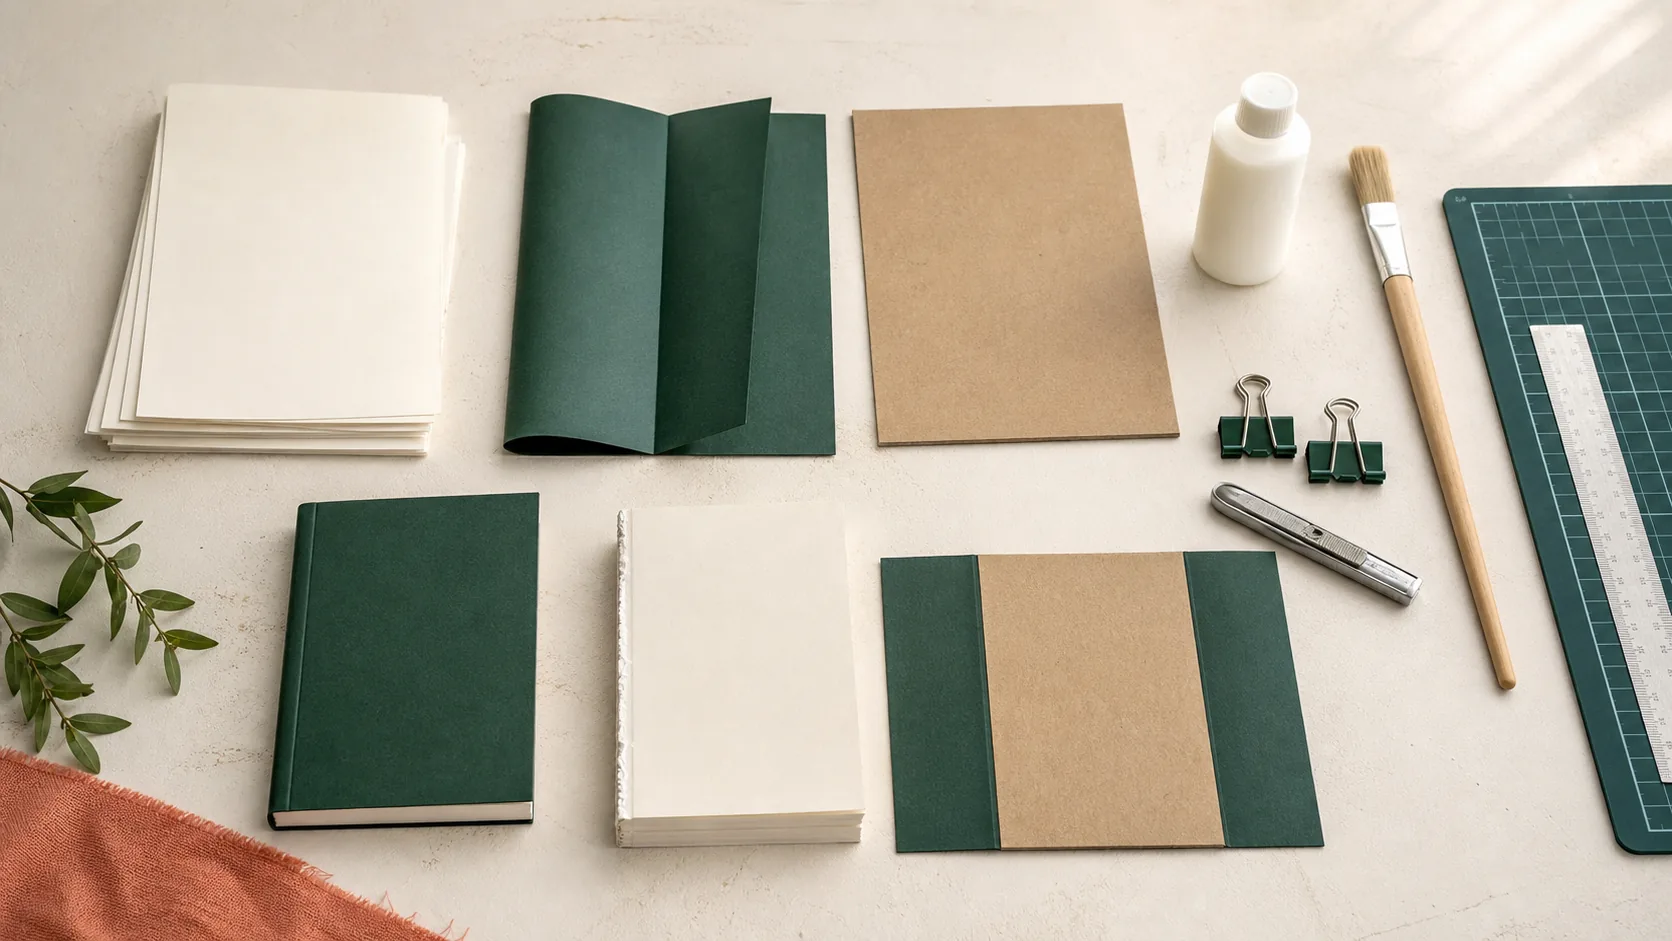
You can turn a stack of loose pages into a simple glued book without sewing or owning a book press. The method is approachable, but the details—paper direction, spine preparation, adhesive control and drying—decide whether the pages stay put.
Can you really bind a book with glue alone?
Yes. Perfect binding holds single sheets together by applying a flexible adhesive to the spine edge of an aligned book block, then attaching a cover. It is the familiar construction used for many paperbacks. A home version can be made with binder clips instead of a book press and without sewing through the pages.
The trade-off is durability. A careful DIY glue binding can work well for a notebook, prototype, keepsake or reading copy. It is not automatically equivalent to a sewn book, a commercially milled adhesive binding, or a case-bound hardcover. If the book will be handled daily by a young child, kept for decades, or presented as a polished gift, binding choice matters as much as appearance.
What the video demonstrates
The video moves through a clear practical sequence: tools and materials, making endpapers, optionally rounding the corners, gluing the loose sheets, making the cover, gluing the cover and showing the finished book. The strongest lesson is that specialist machinery is not required for a first experiment. The less obvious lesson—reinforced by experienced viewers in the comments—is that a successful glue binding depends on what happens at the spine.
Several viewers highlighted useful refinements: crease endpapers with the paper grain, lightly roughen the spine, fan the pages in both directions while brushing on adhesive, score board before cutting, and protect the inside pages from stray glue. Those additions turn a visually simple craft into a more repeatable process.
Materials for a simple no-sew glue binding
- Printed loose pages in final reading order and at one consistent trim size
- Two endpapers cut to the same finished page size and folded in half
- Bookbinding PVA or another flexible adhesive specifically rated for paper and book work
- Small flat brush for a controlled, even adhesive layer
- Binder clips plus scrap board to prevent clip marks
- Metal ruler, cutting mat and sharp craft knife for safe, accurate cuts
- Cover stock or thin binder’s board, depending on the kind of cover you want
- Bone folder or blunt scoring tool for clean folds
- Fine sandpaper or an emery board for very light spine preparation
- Waxed paper, release paper or a suitable plastic barrier to isolate wet adhesive from finished pages
- Optional corner-rounding tool if that finish suits the book
Do not assume any white household glue will behave like bookbinding PVA. Drying flexibility, water content, acidity and long-term aging vary. Follow the adhesive manufacturer’s instructions and test a few pieces of the actual paper first.
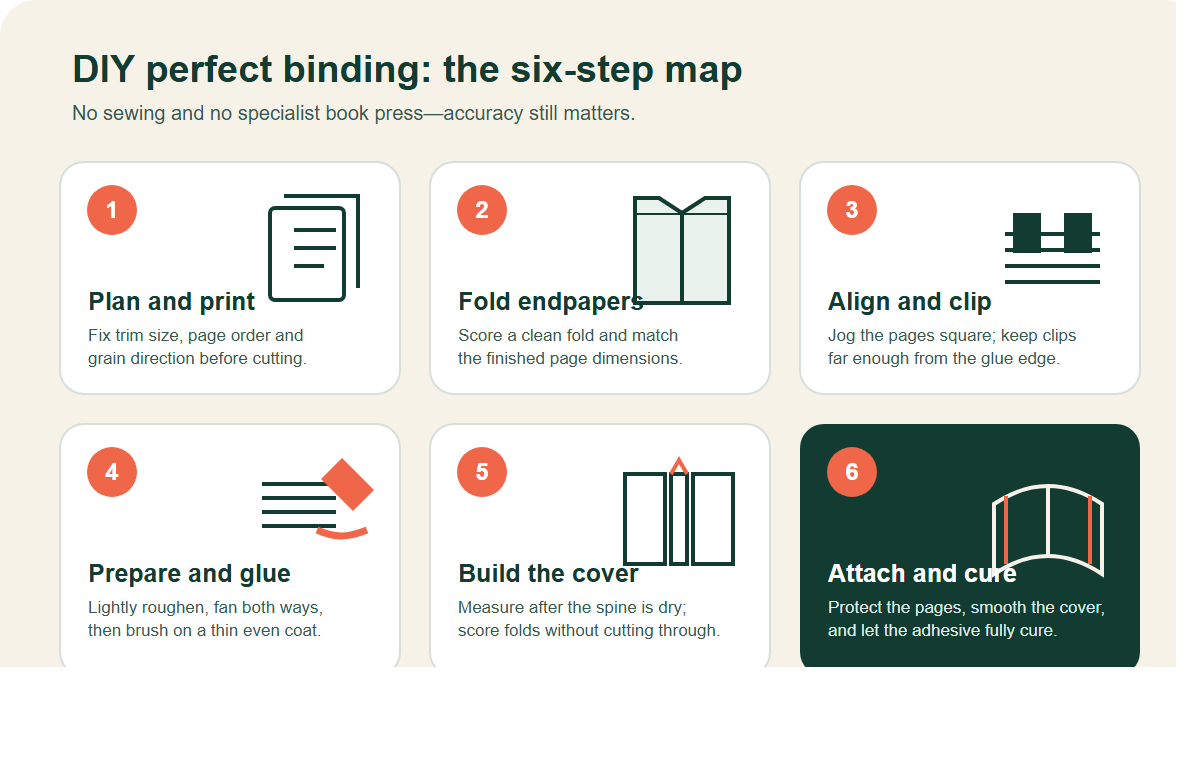
How to bind loose pages with glue, step by step
Step 1: Fix the trim size and page order
Finish the digital file before touching the glue. Every page should have the same width and height, and the stack should already be in final reading order. If you are printing at home, first test whether your printer adds an unplanned border or scales the pages.
When you can choose the paper, run the grain parallel to the spine. Paper folds and opens more comfortably with the grain, while cross-grain sheets are more likely to resist the cover and create waviness. Library of Congress treatment guidance also specifies grain parallel to the height of a book for spine-lining paper—an important reminder that grain direction affects book mechanics.
Step 2: Make and fold the endpapers
Cut two sheets to twice the page width, then fold each in half so the folded size matches one interior page. Score gently before folding instead of forcing a crease with the sharp edge of a knife. The endpapers help connect the book block to the cover and give the inside front and back a clean finish.
Place one folded endpaper at the front and one at the back. Confirm that all open edges and folds face the correct direction before clipping the block.
Step 3: Align and clamp the book block
Tap the stack on a flat surface until the head, tail and fore edge are square. Sandwich it between two pieces of scrap board and add binder clips. Keep the clips low enough to hold the sheets firmly but far enough from the spine to leave room for brushing.
If you want rounded outer corners, cut or punch them now while the pages are still loose and accessible. Do not try to force too many sheets through a small corner punch at once.
Step 4: Prepare the spine and fan on the adhesive
Lightly abrade the spine edge with fine sandpaper or an emery board. The goal is to expose a little paper fibre, not to shorten the pages or create deep grooves. Remove dust before applying adhesive.
Fan the pages slightly in one direction and brush on a thin layer of PVA so the adhesive reaches the page edges. Fan the block in the opposite direction and repeat. Return the block to square, clean away excess adhesive and hold it still. Thin, controlled coats are safer than one heavy layer that soaks the paper and creates ripples.
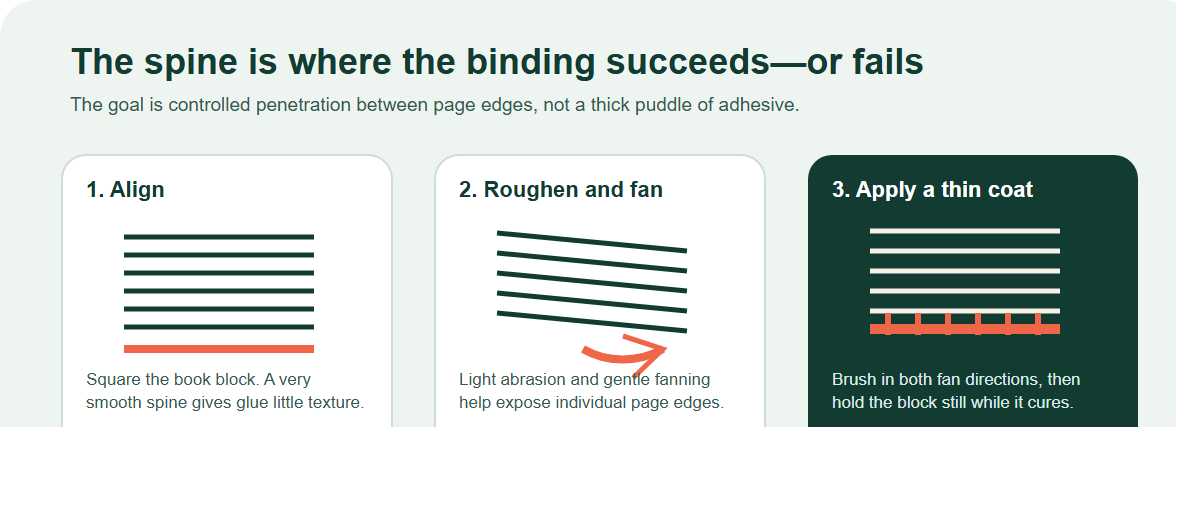
Step 5: Let the book block dry without moving
Leave the block clamped until the adhesive has set, then follow the stated cure time for your product. “Dry to the touch” is not always the same as fully cured. Moving the pages too soon can break the new bond before the cover is attached.
Some DIY methods use more than one thin coat. If you do, let each application settle as directed and avoid building a stiff ridge. Flexibility at the spine helps the book open without immediately tearing pages free.
Step 6: Measure and make the cover
Measure the dried book block—not the loose stack—because the glued spine determines the final thickness. Mark the front, spine and back panels on the cover material. Score the two spine folds with a blunt tool and metal ruler. Test-wrap the cover around the block before adding glue.
For a simple paperback-style cover, one continuous sheet can wrap around the text block. A true hardcover uses separate boards, a spine piece, covering material and a different casing-in structure. Do not call a stiff DIY wrapper a case-bound hardcover if it was not built that way.
Step 7: Attach the cover and allow a full cure
Insert release paper or another safe barrier behind each endpaper to keep moisture away from the text pages. Apply a thin, even coat where the cover and endpapers will meet. Position the spine first, close the cover carefully, then smooth from the center outward to push out air and prevent wrinkles.
The video demonstrates that a specialist press is not essential. Even so, the book must remain flat and undisturbed. Use clean boards and evenly distributed weight only if that suits the adhesive and cover material. Remove scrap paper before any leaked adhesive bonds it to the book.
Five common perfect-binding mistakes—and what they usually mean
| Problem | Likely cause | What to change next time |
|---|---|---|
| Pages pull out individually | The spine was too smooth, adhesive stayed on the surface, or the block moved before curing | Lightly roughen, fan both ways, use a flexible book adhesive and respect the full cure time |
| Pages ripple near the spine | Too much water-based adhesive or no barrier behind the endpaper | Use thinner coats, scrap/release paper and controlled pressure |
| The cover cracks at the folds | The stock was folded against its grain, not scored, or was too brittle | Test the material, score with a blunt tool and choose a more suitable cover stock |
| The fore edge looks uneven | The stack was not squared or too many sheets were cut in one pass | Jog and clamp the block carefully; use multiple light knife passes or professional trimming |
| The book will not lie flat | This is partly structural: perfect-bound spines resist opening | Do not force the spine; choose a lay-flat, sewn or other suitable construction when flat opening is essential |
Extra considerations for a children’s book
A birthday keepsake and a book intended for daily toddler use are different products. Before choosing DIY perfect binding, consider:
- Handling: young children pull pages and open books beyond the normal angle.
- Paper: thin uncoated sheets behave differently from thick coated picture-book pages.
- Edges and corners: the finishing method should suit the child’s age and supervision.
- Color: a Procreate, Canva or PDF file can look brighter on screen than it prints.
- Meaning: if the project is irreplaceable, make a proof or prototype before committing the final artwork.
Should you bind it yourself or order one professional copy?
DIY is the better choice when the making process is part of the pleasure, you are testing an idea, or a few handmade imperfections are acceptable. It teaches you how grain, glue, trim and cover measurements interact.
Professional one-copy production is usually the better choice when you want a finished hardcover gift, consistent trimming and color, a durable result, or you simply do not want to buy tools and repeat failed tests. The hidden cost of DIY is not only materials; it is also setup, trial prints, drying time and the possibility of starting again.
If that is your goal, see how YourBookBound turns a finished file into one physical book and compare the fixed-price, shipping-included options before deciding.
Which route fits your project?
Choose DIY glue binding if… You want a craft project, prototype, notebook or learning experience.
Choose one-copy professional printing if… You already have a finished book file and want one polished physical hardcover delivered to you.
YOUR STORY IS FINISHED
Not sure whether your file is ready to become a real book?
Upload your PDF, Word, Canva export or page images for a free human file check. There is no payment at upload. YourBookBound will review the file, explain what needs attention and recommend the right fixed-price one-copy service.
Frequently asked questions
What glue should I use to bind a book?
Use a flexible adhesive sold for bookbinding or paper work, commonly bookbinding PVA. Test it with your paper and follow the manufacturer’s directions. General-purpose household glue may dry too stiff, contain too much moisture or age unpredictably.
Can I bind printer paper without sewing?
Yes. Loose printer sheets can be perfect-bound at the spine with a suitable adhesive. Page alignment and spine preparation are critical because there are no folded signatures or sewing to hold the block together.
Do I need a book press for perfect binding?
No specialist press is required for a simple DIY version. Binder clips, scrap boards and evenly distributed weight can keep a small book square. A press improves repeatability but does not replace careful measurement or correct adhesive use.
Will a glued book lie flat?
Usually not completely. A standard perfect-bound spine is designed to flex, not to open flat like some sewn or lay-flat constructions. Forcing it flat can shorten the life of the binding.
Is DIY perfect binding suitable for a children’s picture book?
It can work for a prototype or supervised keepsake. For a frequently handled gift book, compare the durability, page stock, finish and opening behavior with a professionally made hardcover before deciding.
Sources and further reading
- porsche and coffee: perfect binding step-by-step video
- Library of Congress: Collections Care Section treatment manual, including adhesive-bound text blocks and grain direction
- Library of Congress: basic book and paper treatment guidance
- Canadian Conservation Institute: Basic Care of Books
Safety note: Craft knives and adhesives can cause injury or damage. Work on a cutting mat, cut away from your body, ventilate as directed and follow every product label.